 Rigworthy
How to Hide Desk Cables: The Order to Do It In
By Rigworthy Editorial Team · Updated September 22, 2026
Rigworthy is reader-supported: we may earn a commission if you buy through our links, at no cost to you. How we make money
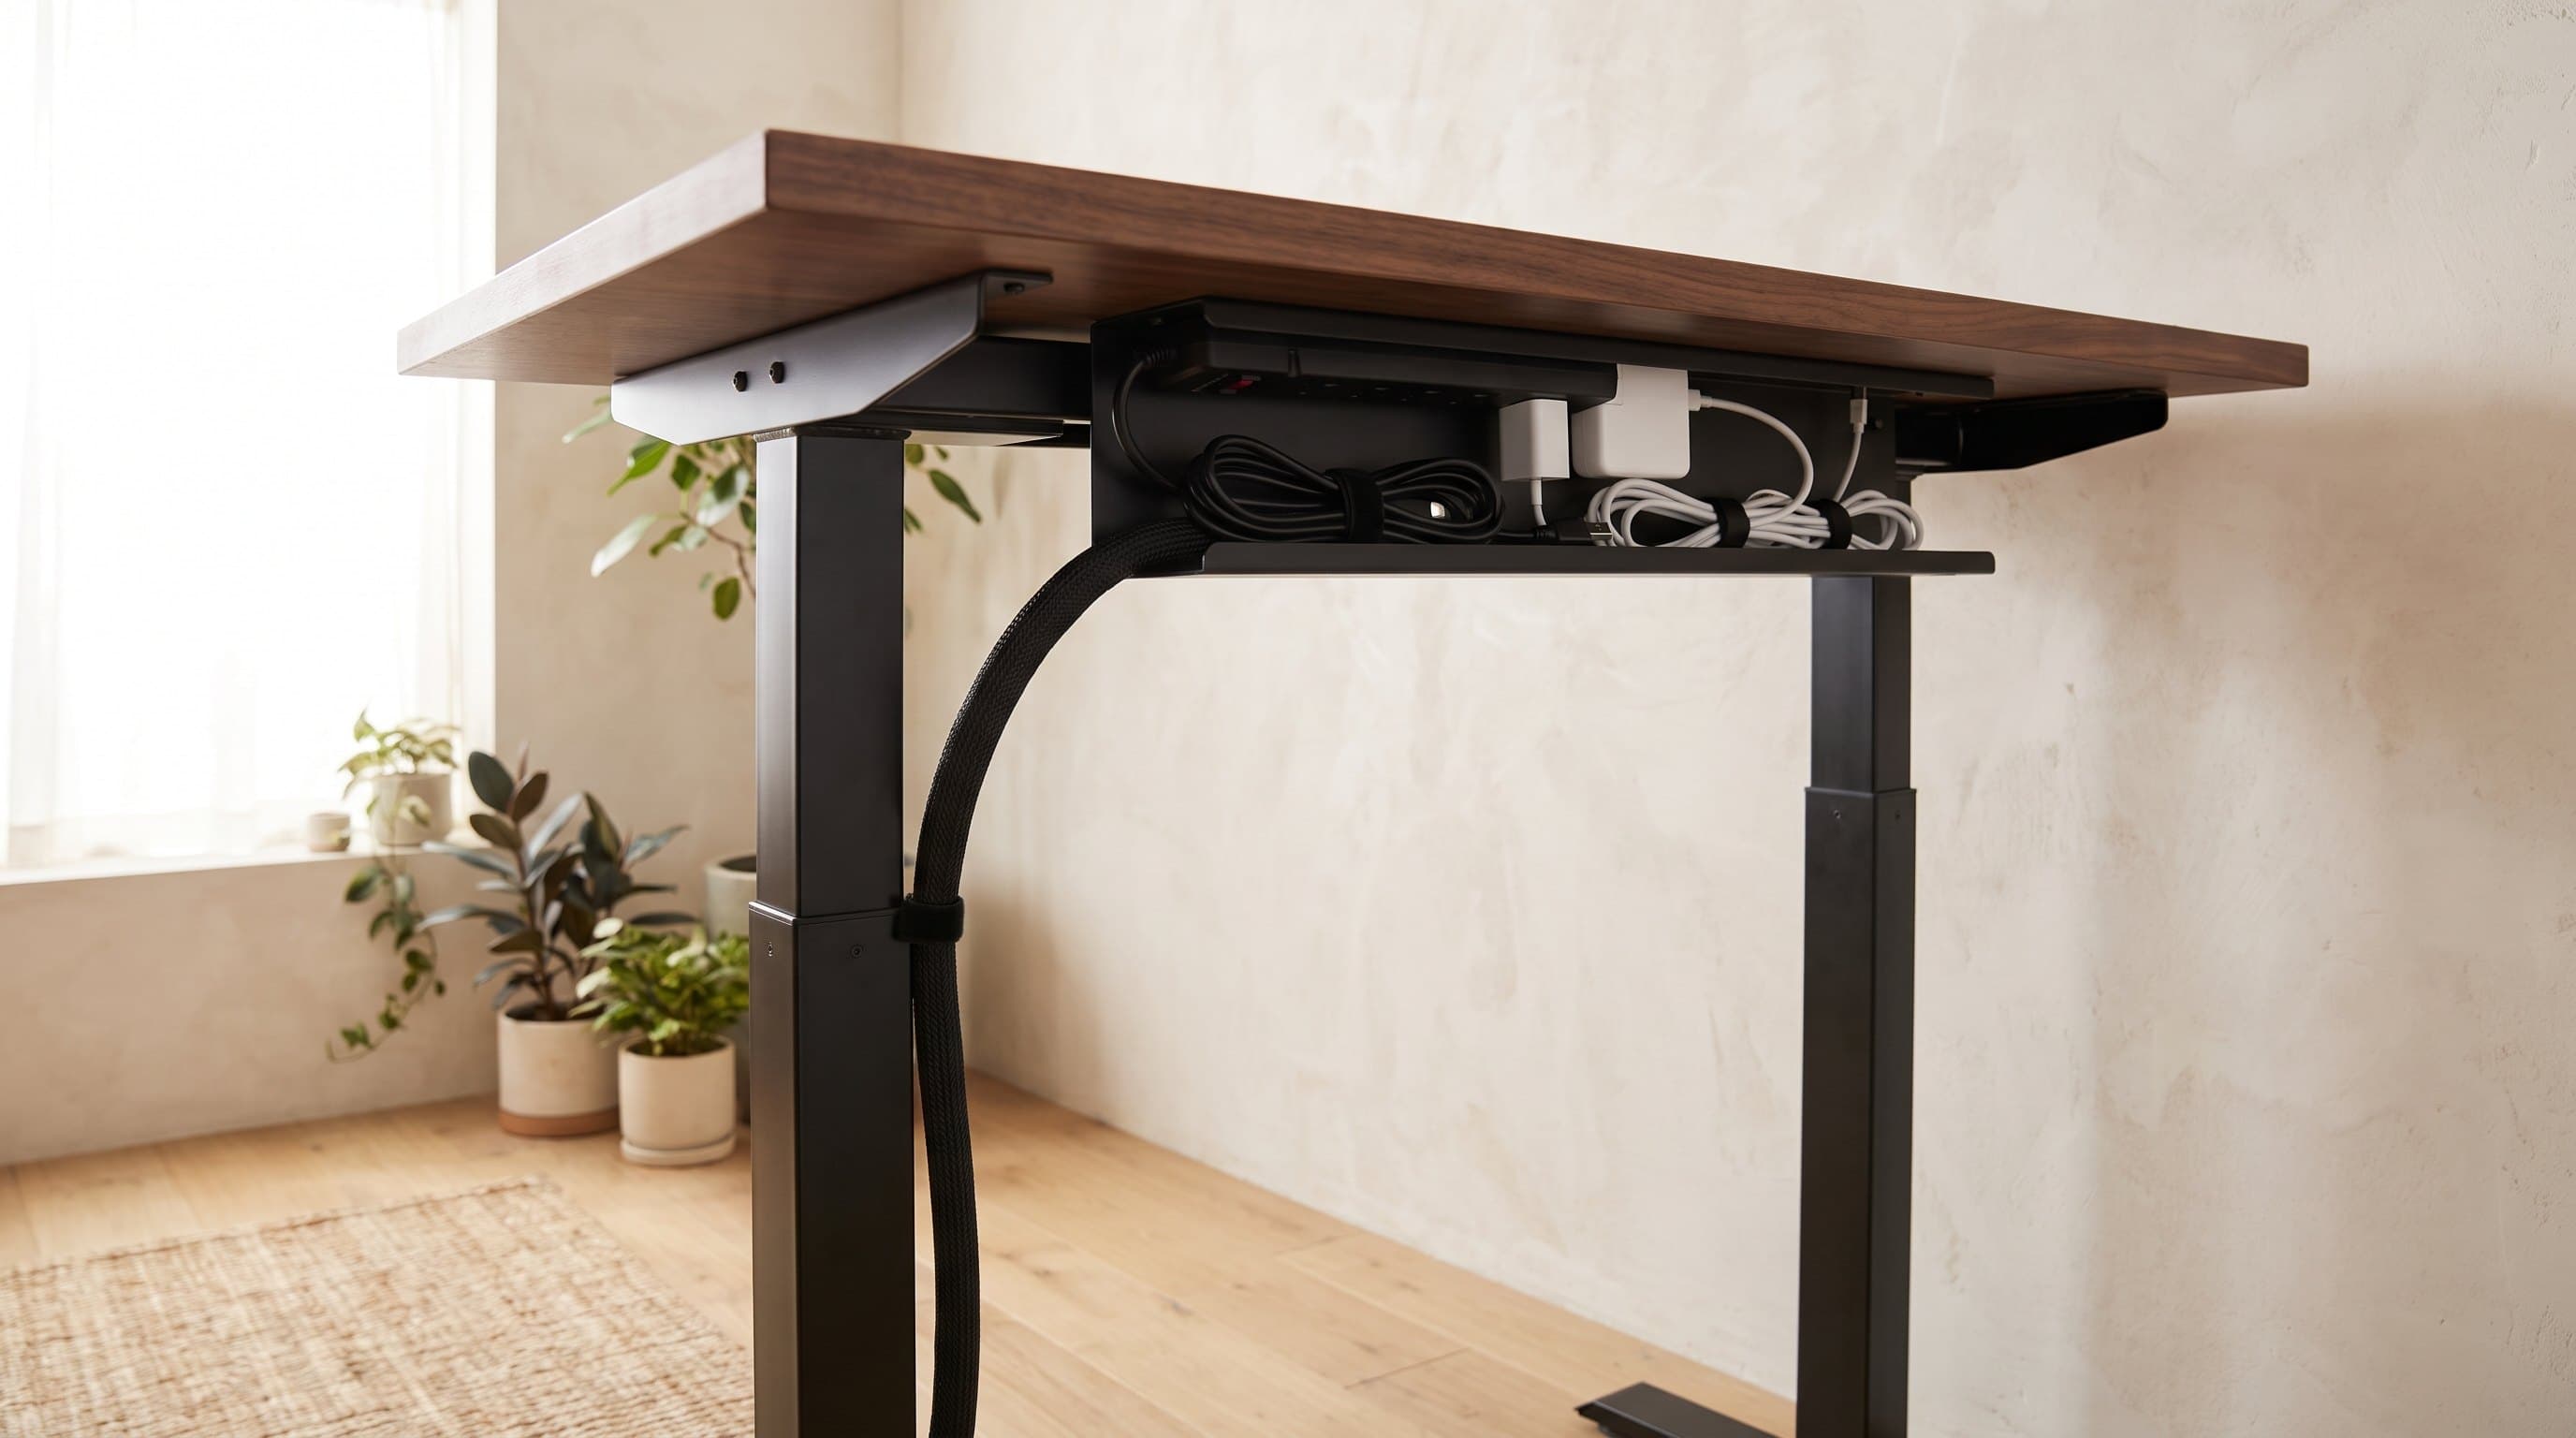
Search for how to hide desk cables and you get a shopping list: a tray, a sleeve, some velcro, a box, and a link to buy each one. The products are fine. The problem is that a list is not a method, and buying five things in the wrong order is how people end up with a tray that is too shallow for their power bricks, a sleeve full of cables they need to reach weekly, and a standing desk that yanks its own surge protector off the floor the first time it rises.
Cable management is a wiring problem before it is a decorating problem. Three decisions determine everything you buy and how well it holds up: which cables move with the desktop and which stay put, what plugs into what, and how much slack the desk's travel actually demands. Get those right and the hardware is almost incidental — most desks are finished with a tray, a mounted strip, a roll of velcro and a sleeve, for somewhere around $75.
This guide runs the whole job in order, and it goes into a couple of places the shopping lists do not. The power section covers an arrangement that a lot of desks end up in and that no manufacturer endorses. The slack section replaces the usual "leave some extra" with a number you can read off your own desk's spec sheet. And the mounting section corrects something we have had wrong in our own cable tray guide.
The short version
- Sort before you shop. Split every cable into what travels with the desktop and what stays on the floor. That one decision determines which products you need and is the step almost every guide skips.
- Aim for one drop. A finished desk has a single sleeved cord going to the floor, not eight. Everything else lives above it in a tray.
- Get the power topology right before you buy hardware. A surge protector goes straight into a wall outlet, and so does a UPS. Strips are not meant to be plugged into each other or into a UPS — that is a listing condition, not a preference.
- Your slack number is on your desk's spec sheet. A sit-stand frame's travel is its maximum height minus its minimum, typically about 25–26 inches on popular frames — more than the "two feet of slack" rule of thumb allows.
- Travel is the one standing desk spec that IS comparable between manufacturers, because it is a difference and the frame-only-versus-with-desktop convention cancels out of it.
- Screw-in is not universal. A honeycomb-core desktop has nothing solid for a tray screw to bite into, and a loaded power strip is exactly the load that pulls one out.
Measurements here come from manufacturers' own published mounting specifications, not from our estimates. Read the full methodology.
Sort the cables before you buy anything
Almost every cable management guide, including the ones written by people who sell cable management, opens with a shopping list. That is the wrong end of the job. The list is easy — trays, sleeves, clips, velcro — and it is also the reason people end up with a tray that turns out to be too short, a sleeve full of cables that needed to stay accessible, and a power strip mounted somewhere it cannot reach the thing it has to power.
Start with an inventory instead, and it takes fifteen minutes. Unplug everything, including the strip from the wall, and pile it on the desktop. You cannot sort a tangle you are still working around, and on any desk that has been in use for a year or two you can reasonably expect to find at least one cable powering nothing at all — a charger for a device you replaced, a dock you stopped using.
Now sort what is left into three groups, and the important split is the first one. Does this cable move with the desktop, or does it stay put? On a fixed desk this is trivially easy — nothing moves. On a sit-stand desk it is the single decision the rest of the job hangs on, because anything that moves needs slack and anything that stays needs to be somewhere the desk will not drag it.
The third group is the one people forget: cables you touch every day. A phone lead, a headphone cable, the charger for whatever you carry in and out. These should be the easiest to reach in the finished setup, and if you bundle them into a sleeve with everything else you will spend the next year fighting your own tidy desk and eventually pulling it apart. Give them their own clip at the front edge and leave them out of the bundle entirely.
One decision worth making consciously at this point, because it is expensive to change later: where does the PC tower live? A tower on the floor is a static object, which means its video and USB cables cross from the moving desktop down to a stationary box and need the full service loop treatment described below. A tower on an under-desk mount travels with the desktop, which means those cables never cross the boundary at all and only the single power lead does. The mount costs money and buys you a genuinely simpler wiring problem.
| Cable | Moves or stays | Where it ends up |
|---|---|---|
| Monitor power and video, with the screen on the desk or an arm | Moves | Desk-mounted strip, or up through a grommet from the tray |
| Laptop charger, dock, desk lamp, speakers | Moves | Desk-mounted strip in the tray |
| The single feed cable from desk to wall | Crosses the boundary | Sleeved drop with the full service loop |
| Router, modem, printer, floor power strip, UPS | Stays | Floor, in a box or against the wall — never in the desk tray |
| PC tower on the floor | Stays — and its video and USB cables now cross | Floor; those cables need slack too |
| PC tower on an under-desk mount | Moves | Travels with the desktop; only its power lead crosses |
| Phone lead, headphone cable, daily charger | Neither — keep it reachable | A clip at the front edge, deliberately outside the bundle |
The target: one drop, not eight
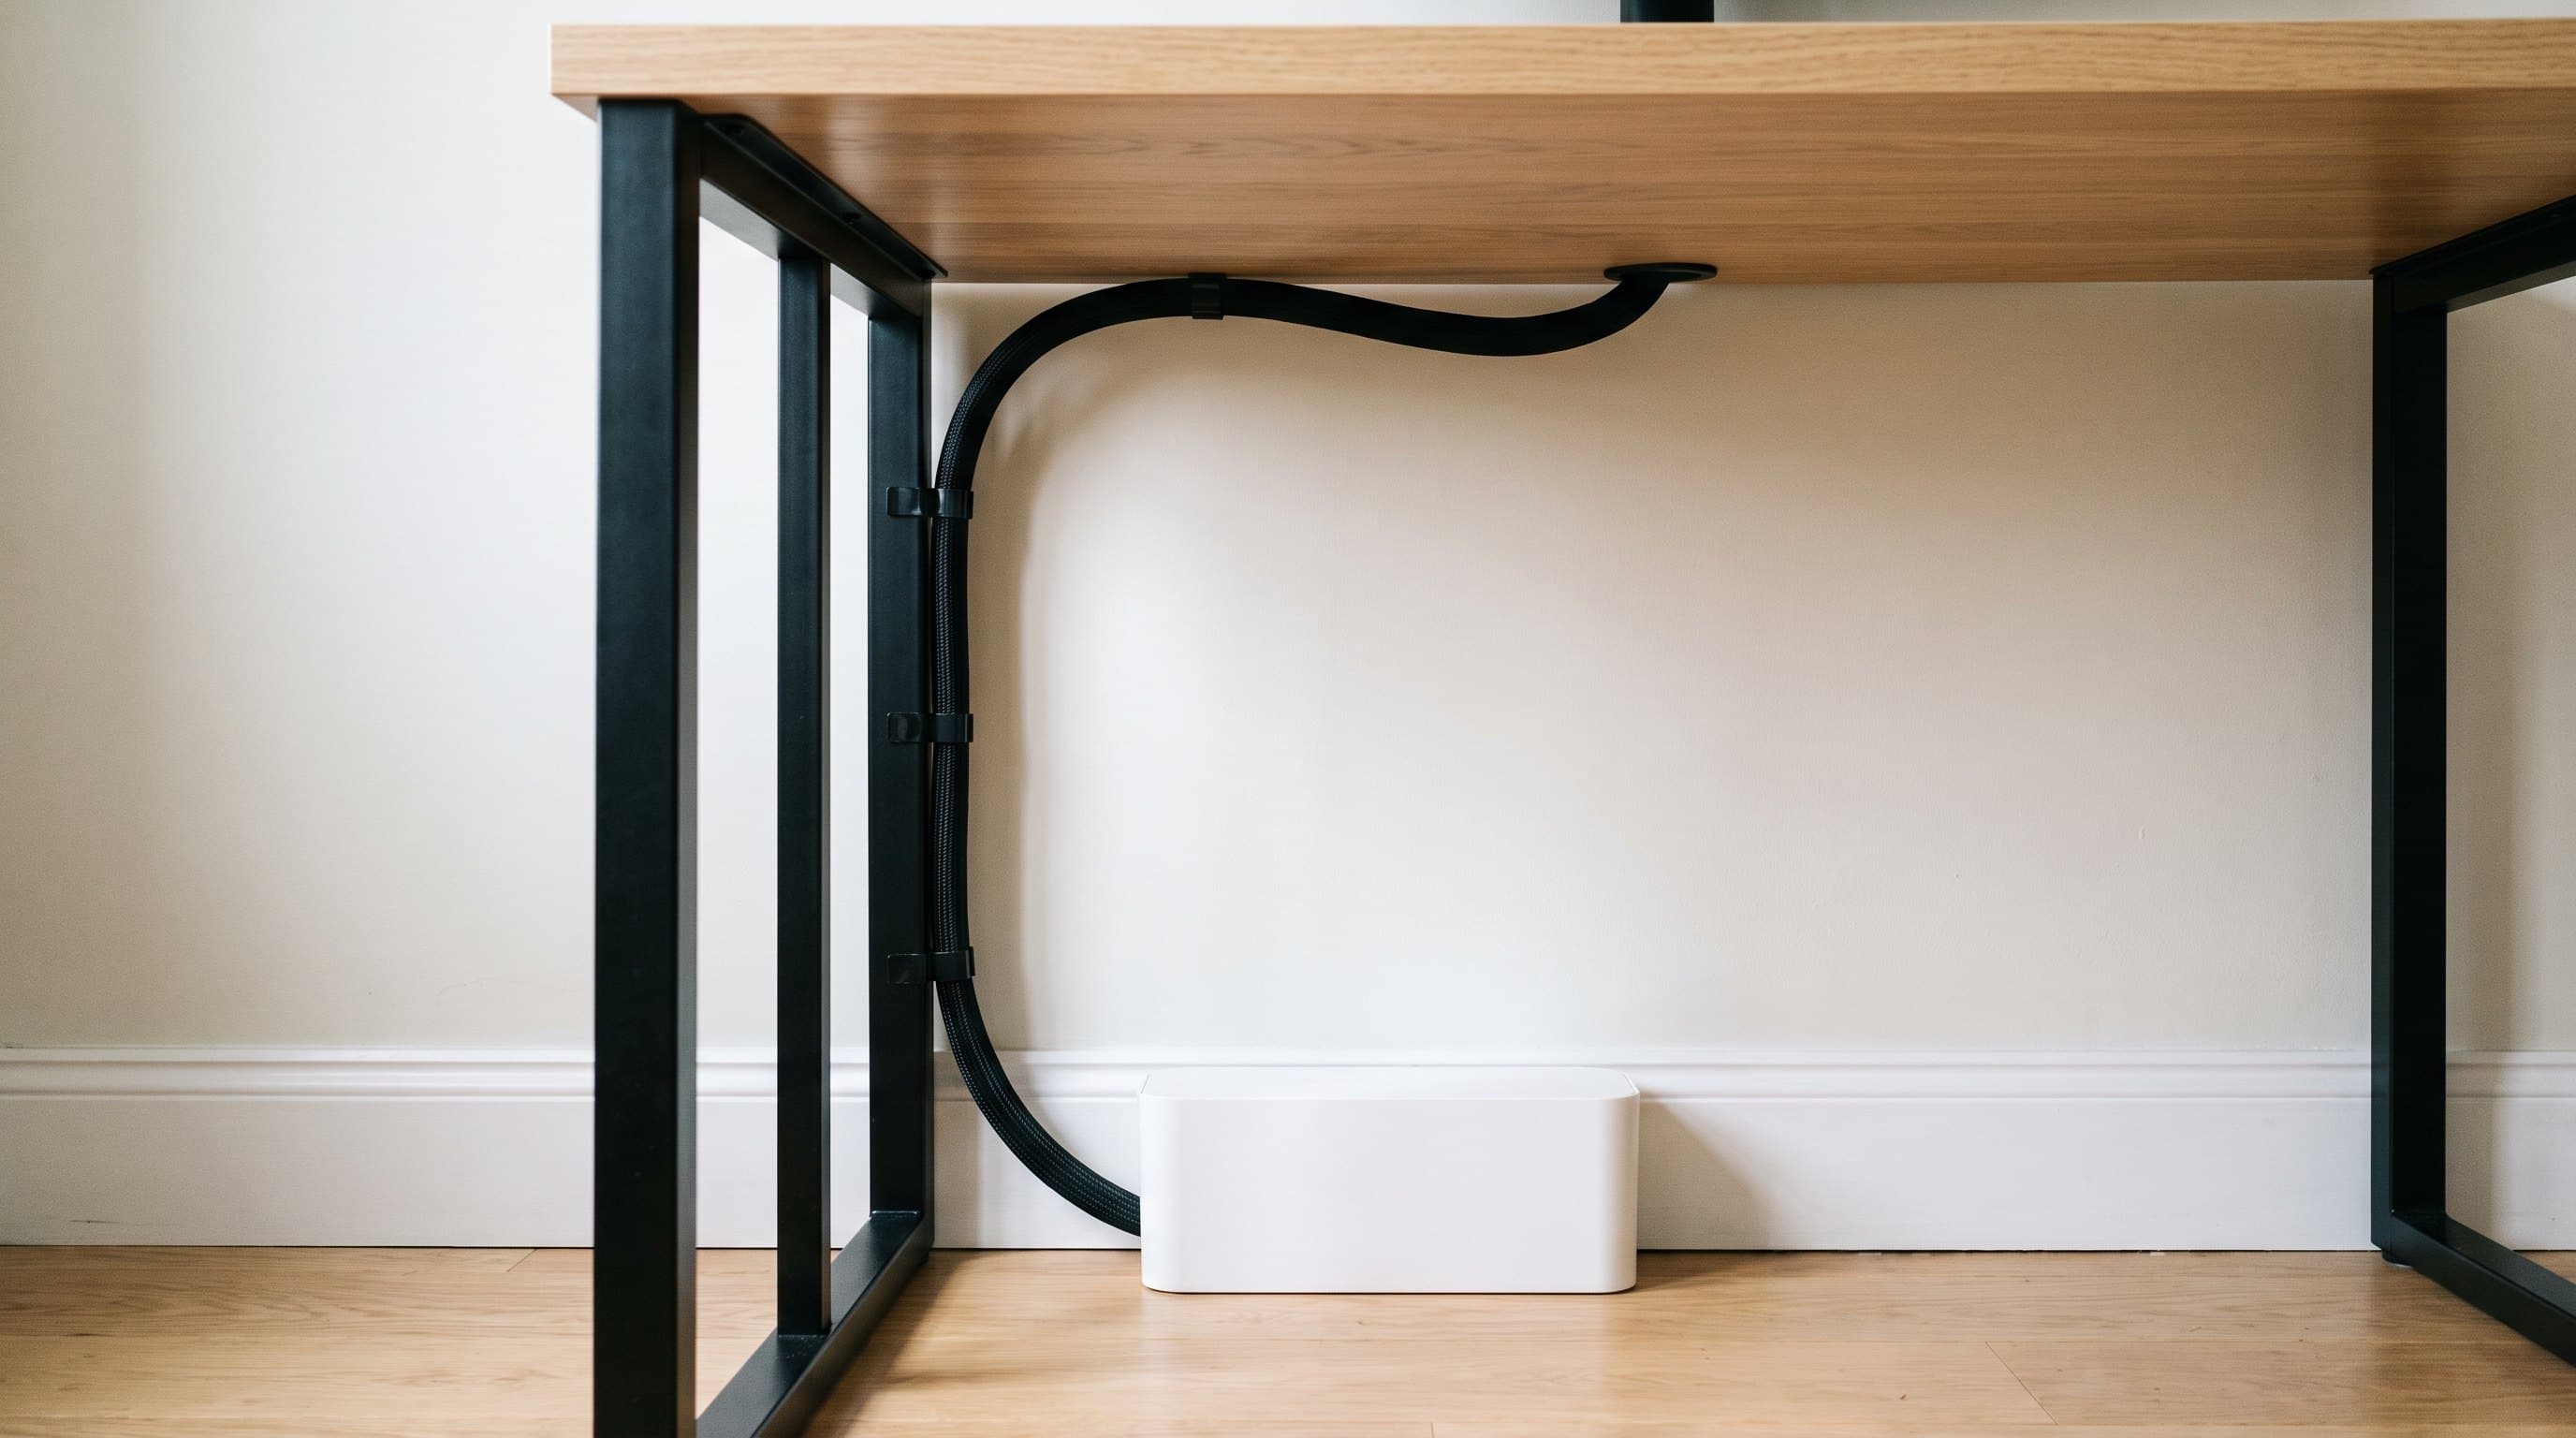
It helps to know what you are building before you start, because the finished state is simpler than the process suggests. A well-managed desk has one cable leaving it. Everything else terminates under the desktop.
The structure is always the same. A power strip is fixed to the underside of the desk, inside or beside a tray. Every device on the desk plugs into that strip, and every one of those cables — plus the wall bricks, plus the slack loops — lives in the tray with it. Then one cord runs from the strip to a wall outlet. That is the drop, and it is the only cable anyone should be able to see.
This is worth stating plainly because it reframes what you are shopping for. You are not buying "cable management." You are buying the few pieces that let you build that shape on your particular desk: something to hold the strip, something to hold the cables, and something to make the drop look deliberate. Our guide to under-desk cable trays covers the first two, and the cheapest possible version of the third is a nine-dollar neoprene sleeve from the boxes and sleeves guide.
Two honest limits on the one-drop ideal. If you have wired Ethernet, that is a second cable crossing to the wall and there is no way around it — run it inside the same sleeve as the power drop and it costs you nothing visually. And if the desk sits in the middle of a room rather than against a wall, the drop has to cross open floor, which is a different and more annoying problem covered in the last section.
The other reason to aim at one drop is not aesthetic. On a sit-stand desk, every cable crossing from the moving desktop to the static floor is a cable that can be pulled taut, snagged, or yanked out of an outlet when the desk rises. Reducing eight crossings to one does not just look better; it removes seven opportunities for the failure mode that makes people stop using the standing function.
Power topology, before you buy a single product
This is the section that changes what you buy, and it is the one no cable management guide runs, because cable management is usually written as a decorating problem. It is also where our own guides, read individually, can leave you with a wiring diagram that no manufacturer endorses.
Here is how that happens. Our power strip guide tells you to mount a rated surge protector under the desktop, which is right. Our UPS guide tells you to put the PC, the monitor and the network gear on a battery backup's battery-side outlets, which is also right. Follow both and the obvious arrangement is a UPS on the floor feeding the desk-mounted surge strip, which feeds everything else. That obvious arrangement is the one thing you should not do.
The rule is not a matter of taste. A power strip is a relocatable power tap, listed to UL 1363, and the instructions attached to that listing say what it is for. OSHA quotes them directly in its 2002 standard interpretation on power strips: "the UL Directory contains instructions that require UL-listed RPTs to be directly connected to a permanently installed branch circuit receptacle; they are not to be series-connected to other RPTs or connected to extension cords." The reason that phrasing carries weight is 29 CFR 1910.303(b)(2), which requires that "listed or labeled equipment shall be installed and used in accordance with any instructions included in the listing or labeling" — the listing condition is the rule, not a suggestion attached to it.
One piece of honesty about scope, since we are quoting a regulator: OSHA governs workplaces, and nobody is inspecting your spare bedroom. What the citation establishes is that the instruction is a real condition of the product's listing rather than a manufacturer's preference — which is the part that still applies at home, along with whatever your renter's policy or landlord has to say about it if something does go wrong.
Manufacturers say the same thing about their own hardware in blunter terms. CyberPower's support material states that surge strips cannot be installed before or after a UPS and that doing so voids the UPS warranty, recommending you buy a unit with more outlets instead. APC's position is that each unit should be plugged directly into a properly grounded wall outlet. The practical failure modes behind the paperwork are real too: a strip ahead of a UPS can mask a wiring or ground fault the UPS would otherwise report, a strip behind one silently multiplies the outlet count past what the branch circuit was sized for, and a second layer of surge components behind a UPS that already has its own adds nothing worth having.
So the correct topology for a desk with both a UPS and a desk strip is two separate feeds, and it is genuinely tidier than the daisy chain once you see it. The UPS sits on the floor, plugged straight into the wall, and the gear whose sudden death costs you something — the PC, the main monitor, the modem and router — runs on long leads directly to its battery outlets. The desk-mounted surge strip also plugs straight into the wall, on its own cord, and carries the things that can simply go dark: the lamp, the speakers, the chargers, the second screen. You now have two drops instead of one, which is the honest trade, and they sleeve together into one visible line anyway.
If two feeds is one too many for your desk, the clean answer is to skip the desk strip and buy a UPS with enough outlets, running everything from it. That is CyberPower's own recommendation in place of a strip, and it sits comfortably with APC's direct-to-the-wall rule. What you should not do is solve the outlet shortage by adding another strip.
| Device | Where it plugs in | Why |
|---|---|---|
| Surge protector or power strip | Directly into a wall outlet | Its listing specifies a permanently installed branch-circuit receptacle, not another tap |
| UPS / battery backup | Directly into a wall outlet | Same rule; a strip ahead of it can also hide a ground fault the UPS would report |
| PC, main monitor, modem, router | UPS battery-side outlets | The gear whose sudden loss costs you work or a call |
| Lamp, speakers, chargers, second screen | The desk strip, or the UPS's surge-only outlets | Low value, and not worth spending battery runtime on |
| Laser printer, heater, vacuum | Wall outlet only | Heating elements and motors draw spikes that can trip or damage a UPS |
| A second power strip | Nowhere | Series connection is outside the listing. Buy more outlets, not more strips |
The number nobody gives you: how much slack a moving desk needs
Search for standing desk cable management and you will be told to leave "generous slack," "two to three feet," or "50 to 60 centimetres." Those are guesses, and at least two of them are too small for the desks people actually buy. The number is not a rule of thumb. It is printed on your desk's spec sheet, and you can work it out in ten seconds.
The distance every crossing cable has to accommodate is the frame's travel: its maximum height minus its minimum height. That is how far the desktop physically moves, and therefore how much extra length a cable needs between its resting position and full extension. Our standing desk height guide has the published ranges for seven popular frames; subtract one number from the other and the travel figures come out at roughly 25 to 26 inches for most of the good ones. The UPLIFT V3 travels 26.1 inches. The FlexiSpot E7 travels 25.6.
Notice what that does to the common advice. "Two feet" is 24 inches, which is less than the travel of every frame in that group — you would reach full height with the cable already dead straight. "50 to 60 centimetres" is 19.7 to 23.6 inches, which is short of all of them by a margin. Neither figure is absurd, and both are fine on a short-travel desk, but as a general rule they are the wrong side of the line.
There is a pleasing detail here that follows directly from a problem we documented in the height guide. Published desk heights are not comparable between manufacturers, because some quote the bare frame and some quote the desk with a one-inch top — a full inch of difference hiding inside a spec that looks precise. Travel does not have that problem. It is a difference between two numbers measured the same way, so the desktop thickness cancels out of it entirely. The UPLIFT V3 is listed at 22.6–48.7 in with a top and 21.6–47.7 in without, and both give 26.1 inches of travel. Travel is the one height spec you can compare across brands without checking the convention first, which is a small mercy in a category that has very few.
Then add margin, for two reasons. A cable at exactly its travel length arrives at full height perfectly straight, which puts the load on the connector rather than on the cable — and a plug being pulled straight out of a monitor at 48 inches is the failure this whole exercise exists to prevent. Cables also need to bend rather than fold. For four-pair Ethernet the standard working figure is a minimum bend radius of about four times the cable's outer diameter; HDMI has no equivalent published standard, and cable makers generally quote something in the same neighbourhood or a little more. Either way, a tight fold at a connector is how you get the intermittent flicker that gets blamed on the monitor. Twenty-five percent over travel is a sensible allowance, which puts a typical frame at roughly 32 inches of service loop.
Two practical notes on the loop itself. Gather the extra length into one loose coil where the cable leaves the desk rather than spreading it along the run, and hold that coil with a single velcro strap so it can open and close as the desk moves — a tight coil cinched down is a cable that cannot travel. And check the total cable length, not just the loop: the cables bundled with monitors and docks are commonly around five feet, and once you have subtracted the run along the underside of the desk, down a leg, and across to the outlet, five feet with 32 inches of loop in it very often does not reach. That is the real reason a tidy standing desk sometimes needs longer cables, and it is much cheaper to discover now than after everything is strapped down.
| Frame | Published range | Travel | Slack to plan for |
|---|---|---|---|
| UPLIFT V3 | 22.6–48.7 in | 26.1 in | ~32 in |
| Autonomous Desk Pro (3-stage) | 27.2–52.7 in | 25.5 in | ~32 in |
| FlexiSpot E7 | 22.8–48.4 in | 25.6 in | ~32 in |
| FlexiSpot E7Q | 25.8–51.6 in | 25.8 in | ~32 in |
| Uplift V2 (standard, discontinued) | 25.5–51.1 in | 25.6 in | ~32 in |
| FlexiSpot E7 Plus | 26–51.6 in | 25.6 in | ~32 in |
| Autonomous Desk Core | 29.4–47.5 in | 18.1 in | ~23 in |
Getting the tray up there — and the desks that will not take one
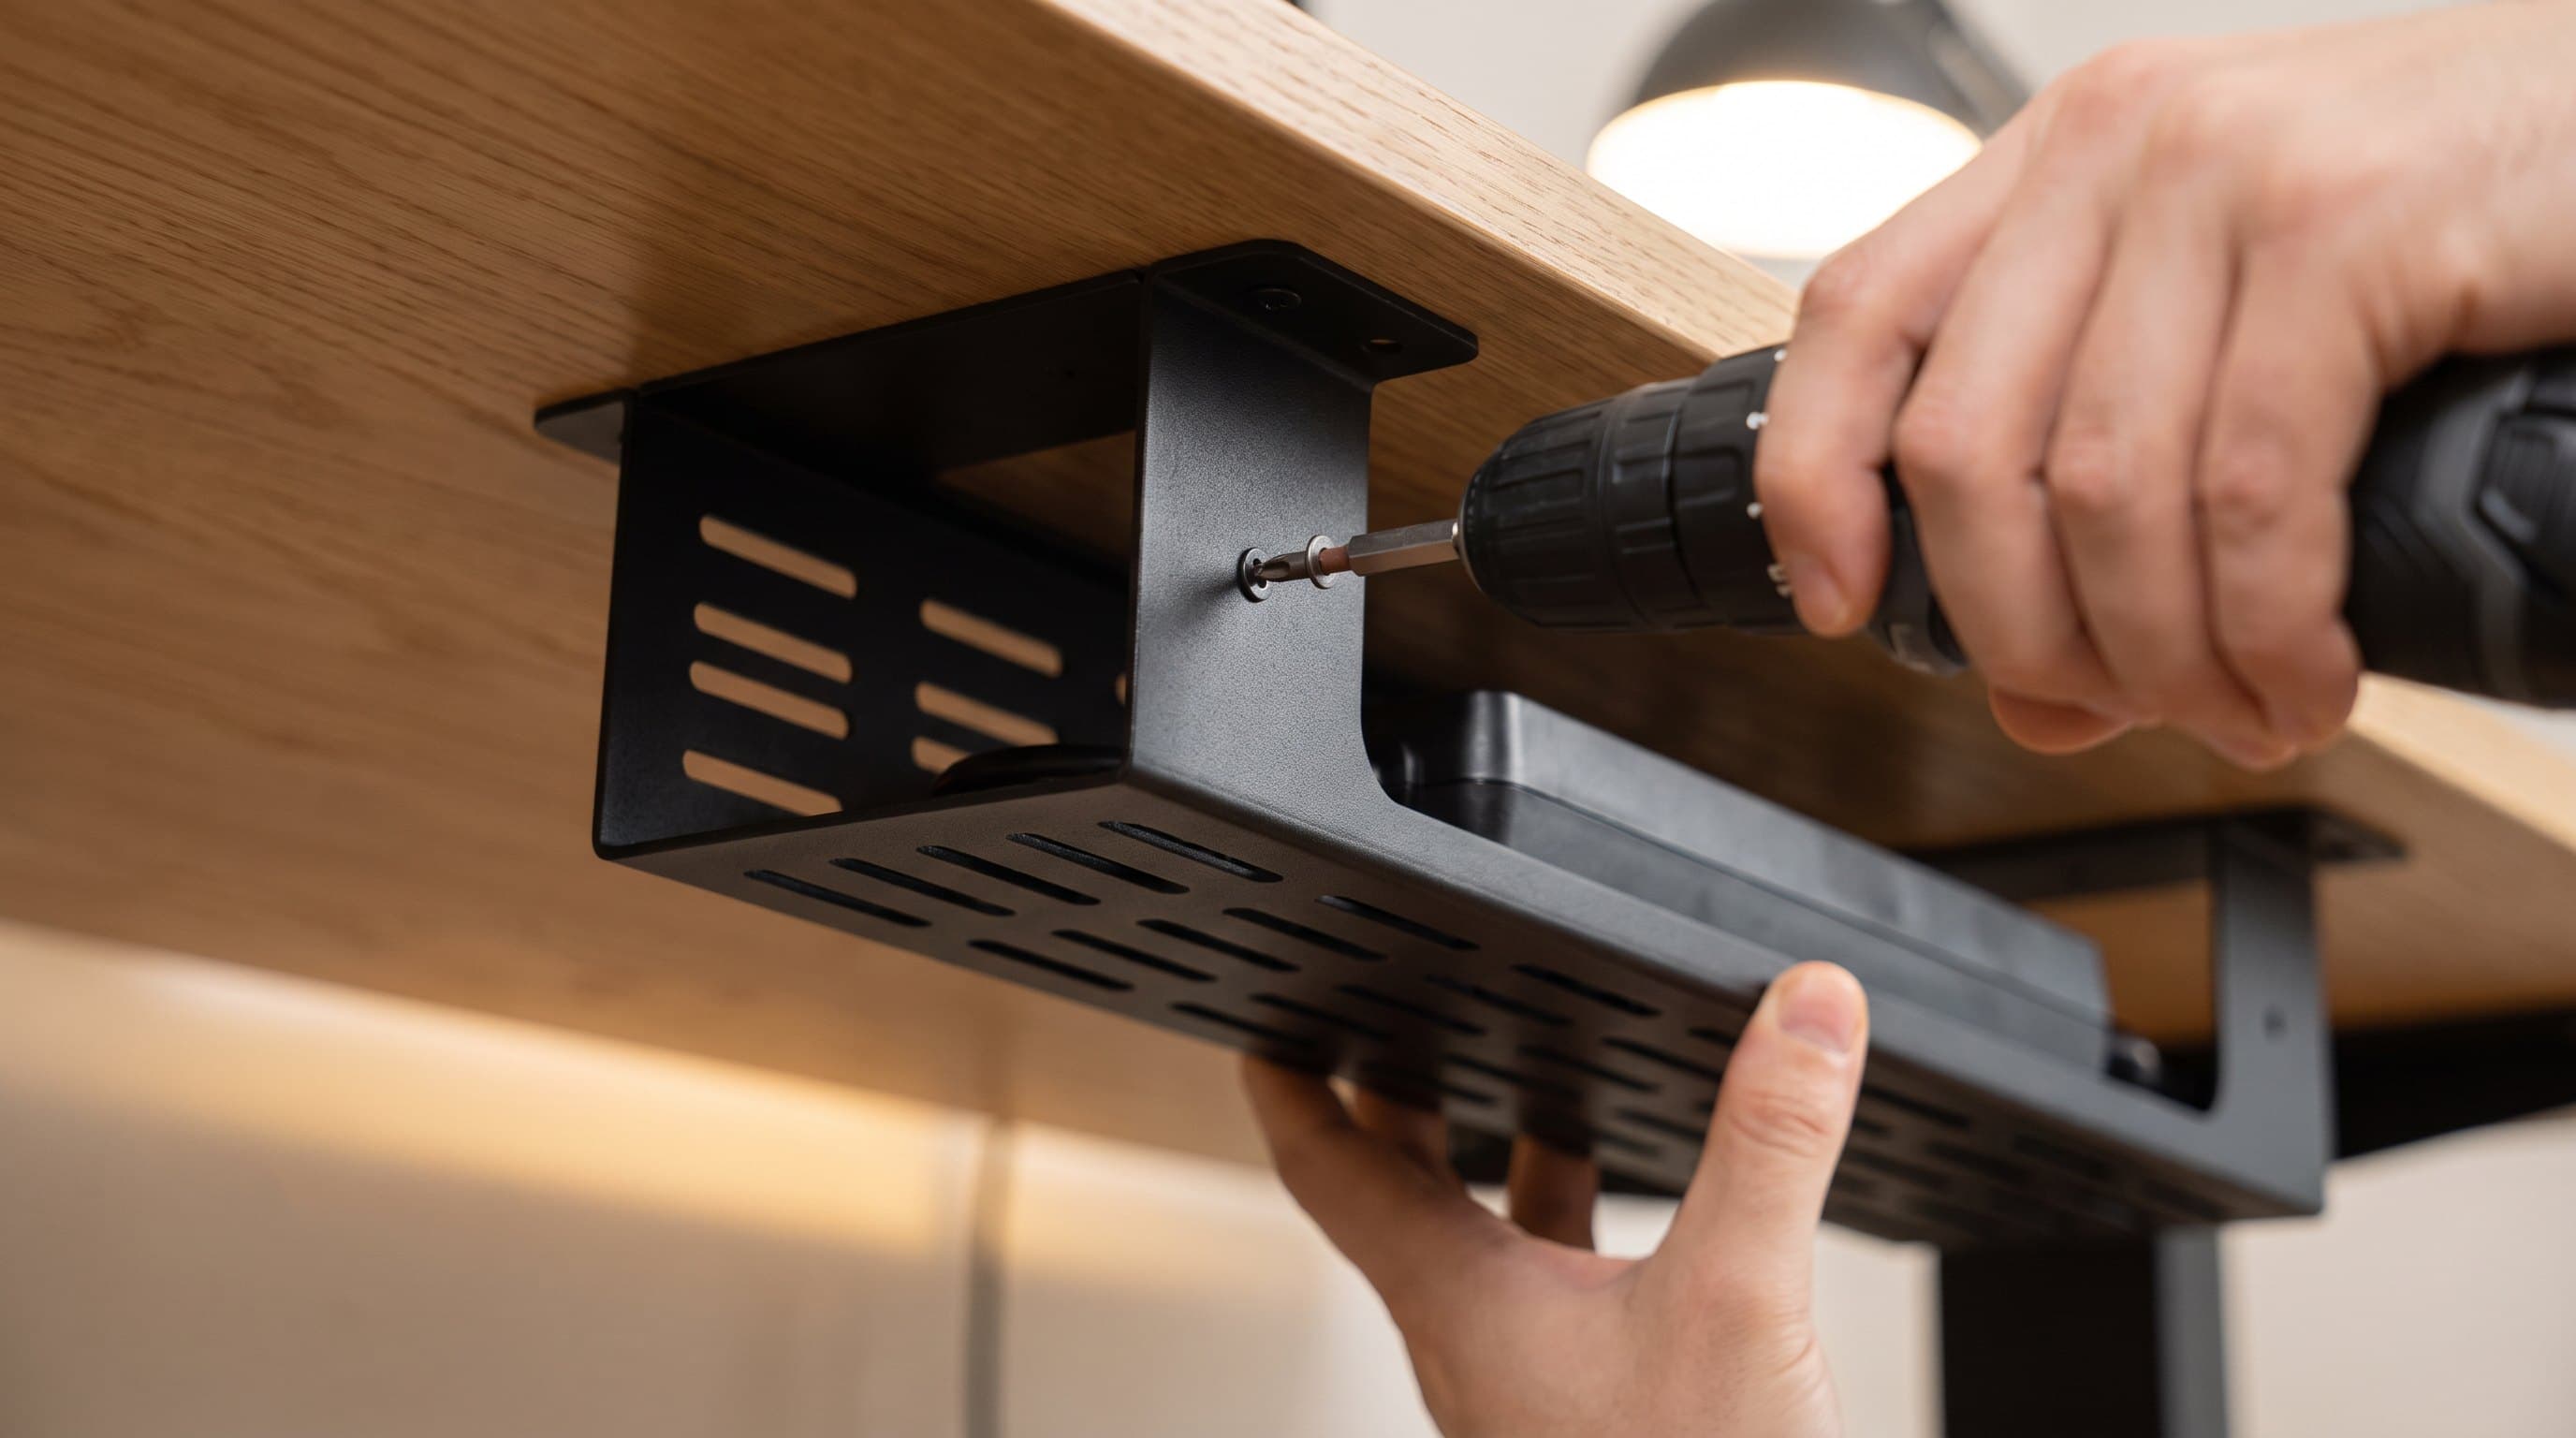
With the sort done and the topology decided, this part is quick. Hold the tray against the underside where you want it, mark the screw positions, drill pilot holes, and drive short screws. The two things worth being careful about are how far back you place it and how long your screws are.
Placement. Set the tray toward the rear of the desktop, not the middle. Cables want to fall down the back, your knees want the front, and a tray in the middle is a tray you will kick. On a sit-stand desk there is a second constraint: the frame's crossbar, control box and leg columns all live under there and all compete for the same space, so hold the tray in position and raise and lower the desk once before you commit to a hole. It is the same clearance problem a monitor arm clamp runs into, which our clamp versus grommet guide covers in more detail.
Screw length. Measure your desktop and use screws shorter than it is thick. This sounds too obvious to state until you have driven a screw through a desk you liked.
Now the part that matters more than either, and where we have to correct our own advice. Our cable tray guide has long said that screw-in is the buy-once answer for "any desk you own with a wood or laminate top thick enough for screws (most are)." That is true of solid wood, plywood, thick particleboard and MDF. It is not true of honeycomb-core desktops, and those are among the most common desks in the world — the IKEA LINNMON family is the well-known example. A honeycomb top is two thin fibreboard skins with a paper lattice between them, and there is nothing structural in the middle. As we established in the clamp versus grommet guide, a screw driven into one is biting into about three millimetres of skin and then spinning in air.
For a picture frame that is fine. For a steel tray holding a loaded surge protector, three wall bricks and the weight of every cable on the desk, it is a slow-motion failure — the tray sags, the screws work loose, and one day the whole thing lands on your feet. If you tap the underside of your desk and it sounds hollow, that is your answer.
Three ways around it, in the order most people should try them. An adhesive J-channel bonded to the skin spreads its load across a wide strip of tape rather than four points, and the skin is perfectly capable of holding that; this is the standard fix and it is also the renter's fix. A clamp-on tray that grips the desk edge sidesteps the panel entirely. Or mount to the frame instead of the top — most sit-stand frames have a steel beam or cross-member under the desktop that will take a machine screw or a zip-tied bracket happily, and it is the strongest option available on a cheap desk. What you should not do is drive longer screws in harder.
One more honest limit: adhesive needs a clean, smooth, sealed surface and a warm room. Wipe the underside with isopropyl alcohol first, press the tape for a good thirty seconds, and leave it a day before loading it. Adhesive that fails almost always failed because it was stuck to dust and loaded immediately.
Routing: thickest first, velcro not zip ties
Cables go in layers, and the order saves you redoing it. Start with the fattest, least flexible things — power cords and wall bricks — and get them lying flat in the tray, because they dictate the space everything else has to fit around. Bricks are the real capacity problem; three of them will fill a shallow tray on their own, which is why our tray guide leads on depth rather than length.
Then run the signal cables — video, USB, Ethernet — as a second layer, and keep them out of the same bundle as the power cords where you conveniently can. The interference argument is mostly overstated for the short runs on a desk and for modern shielded cables, but there is a better reason to separate them: you will unplug a USB cable ten times more often than a power cord, and a bundle that mixes the two is a bundle you have to open every time.
Bundle with velcro straps, not zip ties, and this is not a preference. A zip tie is a permanent decision made with a tool that makes it very easy to overtighten, and an overtightened tie crushes the jacket of the cable underneath it — which is the same bend-radius problem as a tight fold, applied continuously. It is also a decision you will reverse: everyone adds a device, changes a monitor, or swaps a dock within the year, and re-doing a zip-tied loom means cutting every tie and starting again. Velcro costs a few dollars for a roll, holds just as well at the tensions involved here, and takes two seconds to open. Reusable ties are the only wire-tie form worth having in a desk kit.
Use adhesive clips for the vertical runs. A row of them down the back of a desk leg turns the drop from a dangling cord into a line that looks like it was designed, and they cost almost nothing. On a sit-stand desk, put them on the leg column that moves with the desktop or on the static base, but do not bridge a clip across the sliding joint — that is a snag waiting to happen.
Label anything you will ever need to identify blind. A strip of masking tape and a pen at the plug end of each power cord is the lowest-effort thing in this entire guide and the one people are most grateful for later, when the question is which of six identical black bricks belongs to the monitor you are replacing.
Finally, leave the tray accessible. The whole reason our category guides favour open trays and velcro over sealed boxes and ties is that cable management is not a one-time project — you will be back in there. A setup that is beautiful and sealed gets undone the first time you buy a new dock; a setup that is tidy and openable survives.
The runs that leave the desk
Everything above lives under the desktop. What is left is the cable or two that has to reach the rest of the room, and each version of that has its own tool. The boxes, raceways and sleeves guide covers the products; this is which one your situation calls for.
The drop to the floor. A neoprene sleeve, zipped or velcroed around the bundle, turns however many cords into one deliberate line. It is the highest visual return per dollar in the whole category and takes about five minutes. It does not hide a cable so much as make it look like a single intentional object, which is most of what people actually want.
The strip that has to stay on the floor. If you rent, or the desk underside is full, or the strip powers the whole room rather than just the desk, it lives on the floor and a ventilated cable box hides it. Boxes are safe for a normal strip and its adapters — but a UPS does not go in one. A desk-class battery backup is a 10 to 25 pound tower that generates heat, wants airflow on all sides, and needs its display and its silence-the-alarm button reachable. Put it beside the desk, not inside anything.
Cables climbing a wall. That is a raceway, not a box: an on-wall channel that takes paint and disappears into the wall colour. Worth knowing before you commit that the adhesive is meant to be permanent-ish and can lift paint coming off, so it is a considered install rather than a repositionable one.
Cables crossing open floor. This is the only part of desk cable management that is a safety issue rather than an aesthetic one, and it is the one to do properly. A low-profile floor cord cover with sloped edges lets a chair roll over it and stops a foot catching it. If the run crosses a doorway or a path anyone else uses, this is not optional. Note too that the obvious workaround, running the cord through a doorway or through a hole in a wall or floor, is specifically what OSHA's flexible-cord rules prohibit in a workplace — and the hazard those rules are written against does not change because the room is yours.
The desk in the middle of the room. The hardest case, and worth saying plainly because the internet mostly pretends it does not exist: if the desk is not against a wall, there is no arrangement that makes the feed cable invisible. You can make it safe and neat with a floor cover along the shortest sensible path, and you can make it one cable instead of four, but it will still be a cable on your floor. The alternative is moving the desk or having an outlet added.
Test at full height before you tighten anything
The last step is the one that decides whether any of this survives, and it takes two minutes. Before you cinch a single velcro strap, plug everything in, sit at the desk, and then raise it slowly to full height while watching underneath.
You are looking for four things. A cable going taut anywhere. A cable snagging on the frame, the crossbar, a drawer unit or the wall. The drop bundle pulling sideways at the floor rather than hanging. And, on a powered desk, the anti-collision sensor stopping the lift — which is the desk telling you it has caught on something, and is a warning worth taking seriously rather than overriding.
Lower it fully as well. The failure at the bottom of the range is different and less obvious: cable that had nowhere to go at full height now has too much, and puddles on the floor or hangs into the path of your chair casters. If the loop is well-behaved at both extremes, it will be fine everywhere in between.
Only then tighten things down. Strap the loops, press the clips, screw the tray fully home, and route the drop. Doing it in this order is the difference between a setup that works and one you take apart next weekend.
Two habits keep it good. Re-check the tray screws after about a week — the same settling that loosens a monitor arm clamp applies to a loaded tray, and a quarter turn then saves the whole thing later. And when you add a device, add it properly: open one velcro strap, run the new cable through the same path as its neighbours, and close it. The five minutes you spend doing that is what stops a managed desk quietly reverting over eighteen months, which is how essentially every one of them fails.
The bottom line
Do the sort first. Fifteen minutes with everything unplugged and piled on the desktop tells you which cables travel with the desk, which stay on the floor, and which you touch daily and should keep out of any bundle — and that single split decides which products you actually need. Almost everything that goes wrong later was decided here.
Then settle the power before you buy hardware. Both the surge strip and the UPS plug straight into the wall, on separate cords: that is what a power strip's listing requires, what CyberPower and APC both tell you in their own documentation, and what stops you building the daisy chain that following our strip guide and our UPS guide separately would otherwise lead you into. Run the PC, main monitor and network gear off the battery outlets; run the lamp, speakers and chargers off the desk strip. If two feeds is one too many, buy a UPS with more outlets rather than another strip.
If the desk moves, size the loop from the frame's own travel — maximum height minus minimum, which is about 26 inches on the most commonly recommended frames and therefore more than the "two feet" rule of thumb allows. Add a quarter on top so the cable bends rather than pulls, and check the total cable length while you are at it, because a five-foot bundled monitor cable with 32 inches of loop in it frequently does not reach the wall.
The hardware is the easy part. An under-desk tray and a mounted strip do most of the work; a $9 sleeve makes the drop look deliberate; a box or raceway handles whatever has to stay on the floor or climb a wall. Buy velcro, not zip ties, because you will be back in there. And if your desktop sounds hollow when you tap it, do not screw a loaded tray into it — use adhesive, a clamp-on tray, or the frame itself.
Then test it at full height and full low before you tighten a single strap. Two minutes there is the difference between a desk that stays tidy for years and one you rebuild next month.
Frequently asked questions
Unplug everything and pile it up. Sort each cable into moves-with-the-desk, stays-on-the-floor, and touched-daily. Decide your power topology — what plugs into the wall, what plugs into the strip, what plugs into a UPS. Only then buy the pieces you need, which for most desks is a tray, a mounted strip, a roll of velcro and a sleeve. Mount the tray at the rear, lay in the thick power cords and bricks first, then the signal cables, then the daily-access cables outside the bundle. Leave a service loop sized to your frame's travel. Test at full height and full low before you tighten anything. Then strap it down. The shopping is step four, not step one — which is the single biggest difference between this and most guides.
Take your frame's published height range and subtract the minimum from the maximum. That difference is its travel, and it is the distance every crossing cable has to absorb. Popular frames land around 25–26 inches — the UPLIFT V3 travels 26.1 in, the FlexiSpot E7 travels 25.6 in — which means the widely repeated "two feet of slack" rule is slightly short for most of them. Add about 25% on top so the cable arrives at full height with a bend in it rather than dead straight, which puts a typical frame at roughly 32 inches of service loop. Usefully, travel is the one desk height figure that is comparable between brands without checking the convention, because it is a difference and the frame-only-versus-with-desktop discrepancy cancels out. Our standing desk height guide has the published ranges.
You shouldn't, and this catches a lot of people because it is the arrangement that follows naturally from buying both. The instructions attached to a power strip's UL listing require it to be connected directly to a permanently installed branch circuit receptacle and not series-connected to other taps — OSHA quotes that language in its own interpretation on power strips, and while OSHA itself only reaches workplaces, the listing condition is a condition of the product wherever it is plugged in. CyberPower states plainly that a surge strip cannot be installed before or after a UPS and that doing so voids the warranty; APC's guidance is that each unit plugs straight into a grounded wall outlet. The right answer is two separate feeds — the UPS into the wall carrying the PC, monitor and network gear, and the desk strip into the wall carrying the lamp, speakers and chargers — or a single UPS with enough outlets to skip the strip entirely.
Yes, but not with screws. Honeycomb-core desktops are two thin fibreboard skins over a paper lattice, so a screw bites a few millimetres of skin and then spins in air — fine for something light, a slow failure under a tray loaded with a surge protector and three power bricks. Use an adhesive J-channel instead, which spreads its load over a wide strip of tape the skin handles easily, or a clamp-on tray that grips the desk edge, or mount to the desk frame's steel cross-member rather than the top. Clean the surface with isopropyl alcohol before applying adhesive and give it a day before loading it. The same panel limitation affects monitor arms, which our clamp versus grommet guide covers in detail.
Velcro, essentially always. Zip ties are cheap and look neat, but they are a permanent decision made with a tool that makes overtightening easy, and an overtightened tie compresses the jacket of every cable under it. More to the point, you will change your setup — a new dock, a second monitor, a replaced laptop — and undoing a zip-tied loom means cutting every tie and rebuilding it, which is exactly why most abandoned cable management projects were zip-tied. A roll of velcro costs a few dollars, holds fine at desk tensions, and opens in two seconds. If you want the zip-tie look, buy reusable releasable ties.
Genuinely good, and cheaper than the drilling version. Adhesive J-channels and clamp-on trays get a strip and its cables under the desktop with no holes; adhesive clips handle the vertical runs down a leg; a neoprene sleeve turns the drop into one line; and a cable box hides a floor-level strip with no mounting at all. The pieces you should skip are on-wall raceways, whose adhesive is meant to be permanent and can lift paint on removal. A sleeve and a box alone will fix most rented desks for well under $40, and if you can add an adhesive tray you are most of the way to the screwed-in result.
Keep building your setup
Cables
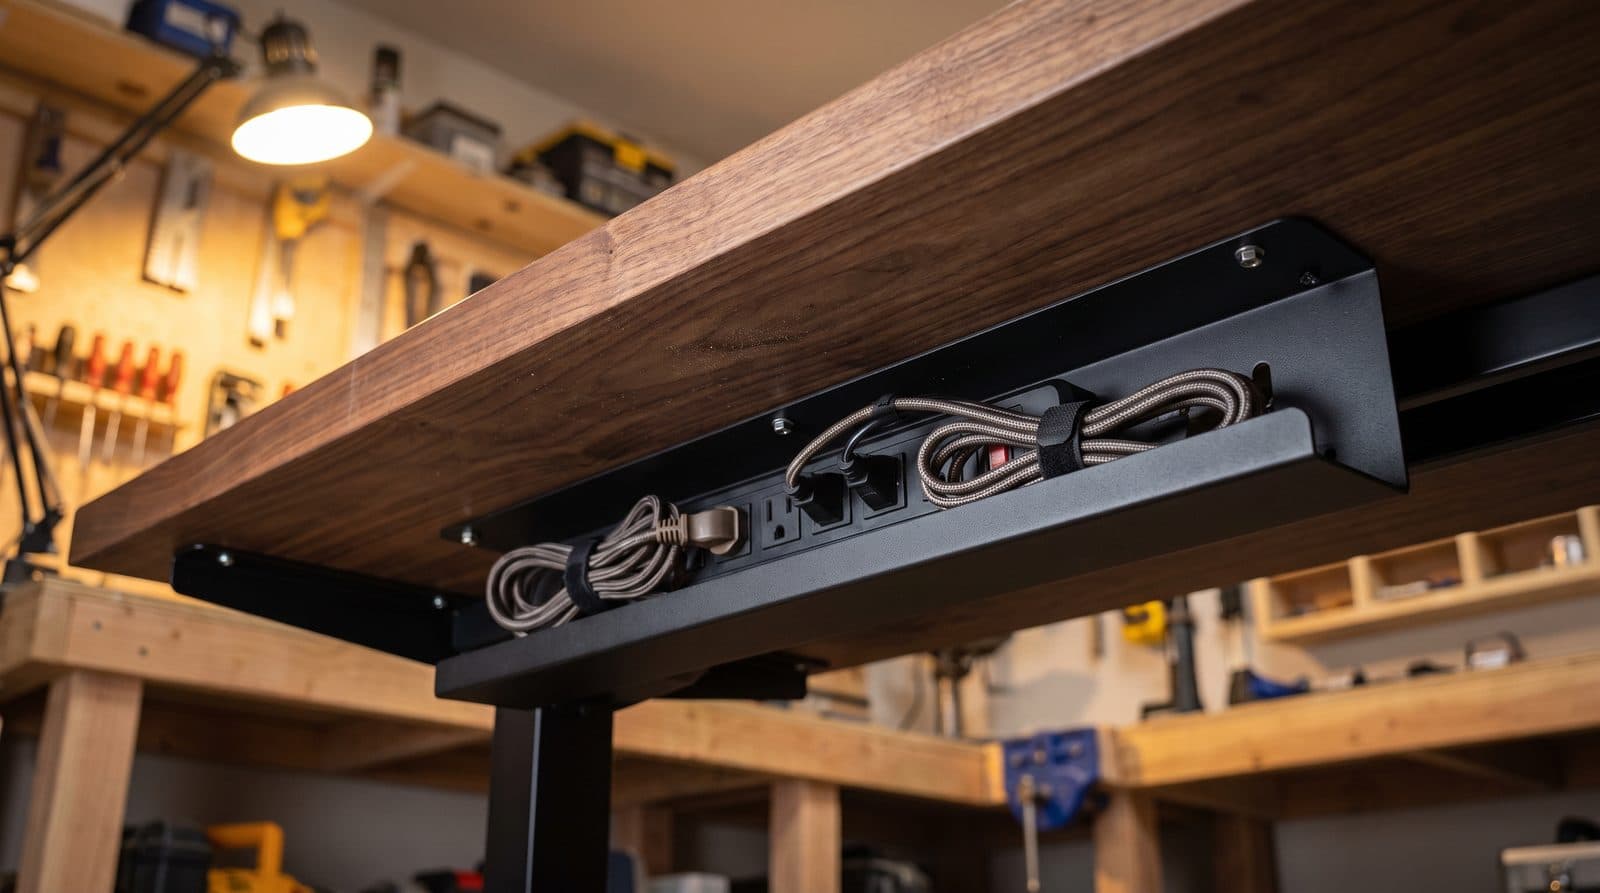
The Best Under-Desk Cable Trays in 2026
The fastest way to a clean 'floating desk' look: five cable trays and channels compared by capacity, mounting method, and standing-desk fit.
Updated September 22, 2026

Cables
The Best Power Strips & Surge Protectors for a Desk Setup in 2026
The strip your cable tray hides and your box conceals — chosen properly. Six desk power strips and surge protectors compared on real surge ratings, USB-C wattage, outlets, and mounting.
Updated August 3, 2026

Cables
The Best UPS Battery Backups for a Home Office Desk in 2026
A surge protector guards against spikes; it does nothing when the lights go out. Six UPS battery backups compared on real watts, waveform, battery-backed outlets, and what a replacement battery costs.
Updated August 7, 2026
Get the next guide in your inbox
One short email when we publish or meaningfully update a buying guide. No spam, no daily deals firehose.